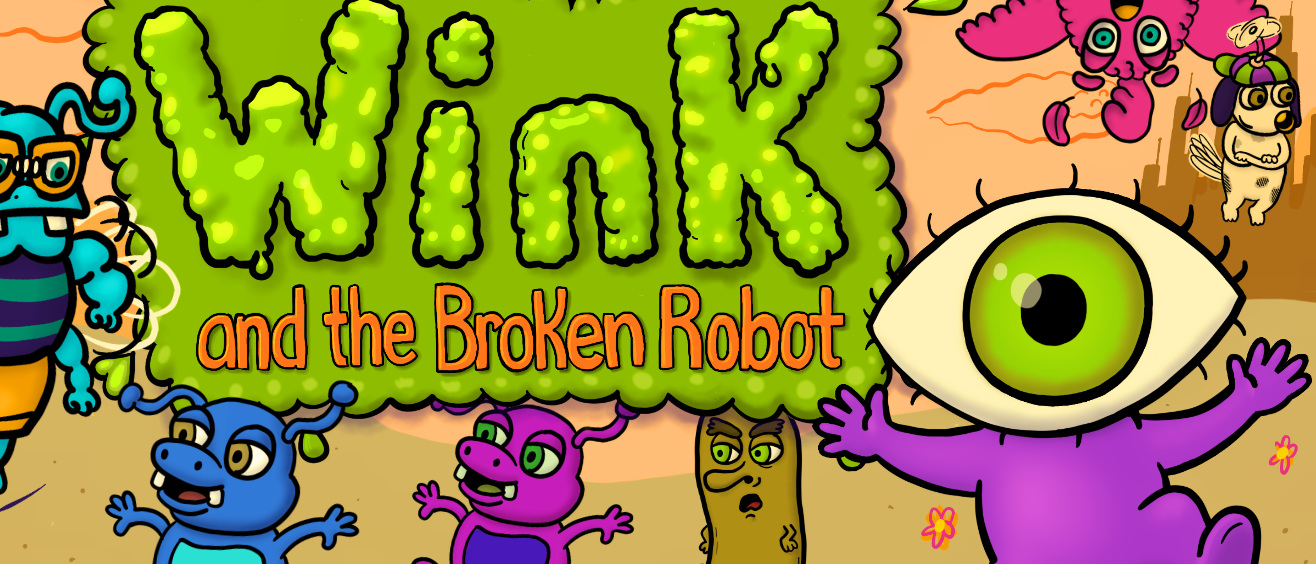
Wink and the Broken Robot
How to Make a Cool Bridge in GB Studio
I was inspired by the talented Blu to try my hand at making a cool dynamic bridge in GB Studio and Nalafala gave me an idea for how to implement it. It was clear the whole bridge couldn’t be made of actors because there is a hard limit of 30 actors per scene, 10 per screen, and 5 per line. It just wasn’t enough!
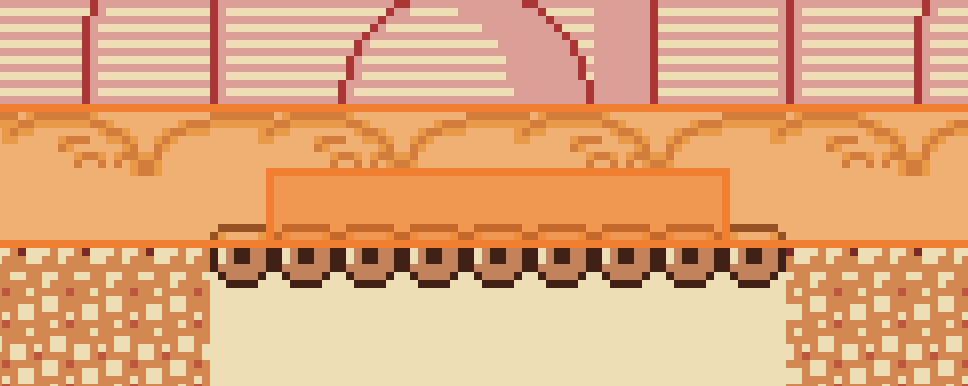
So, my bridge uses tiles to form the main bridge and only one actor to make the part of the bridge that Wink is standing on and pushing down.
Here’s what you’re going to need to make:
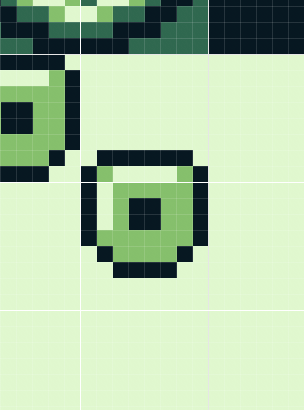
- A bridge tile that goes slightly above the bottom of the tile and down into the tile below
- A sprite of two bridge pieces that goes one pixel above the bottom half. The background of the sprite needs to be solid, not transparent
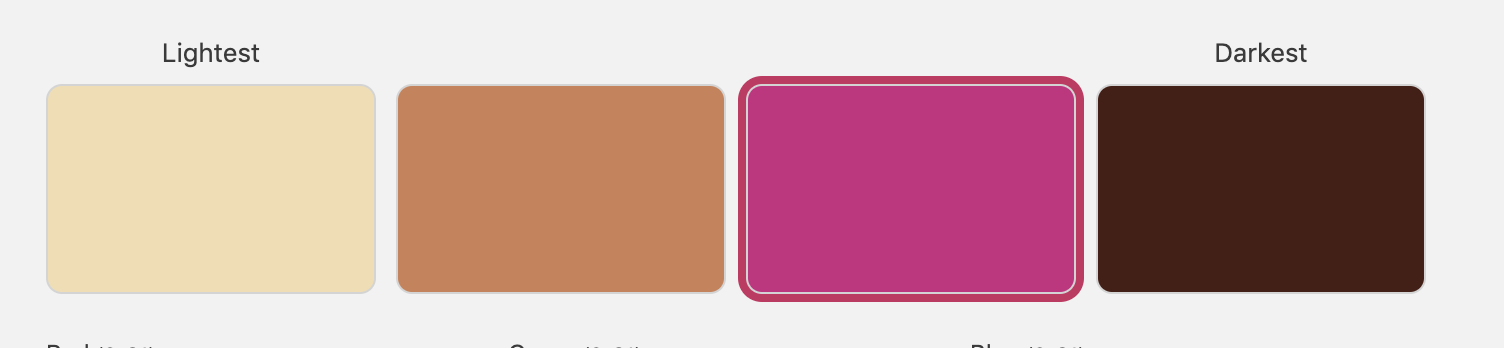
- Two color palettes:
- One for the background tile. You can use any colors you want. Best results from having only 3 colors including the background
- One for the sprite tile. The solid background should have the same color as the background tile of the bridge tile. This will hide the bridge tile when the sprite is on top of it, giving it an illusion of movement


Now we’re going to put these in action!
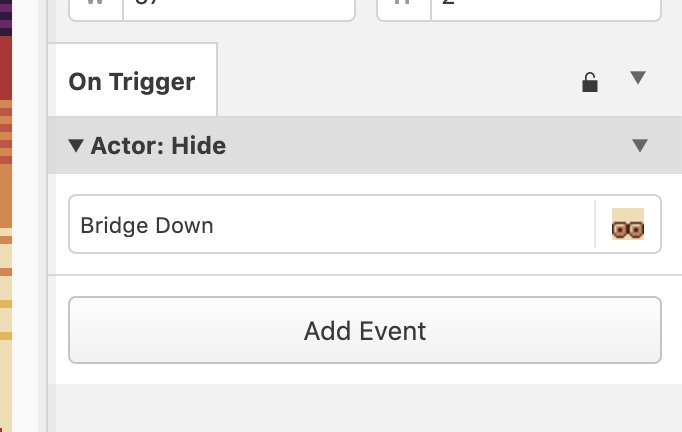
First, make an actor that has the bridge sprite and bridge sprite palette. Name it “Bridge Down” to make this documentation a bit easier, but you can name it anything you want. In the Init tab, add Hide Actor to hide Bridge Down at the start of the scene.
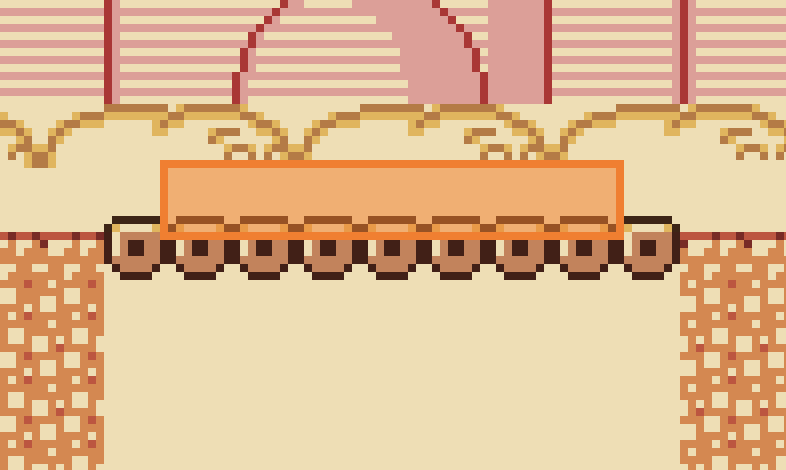
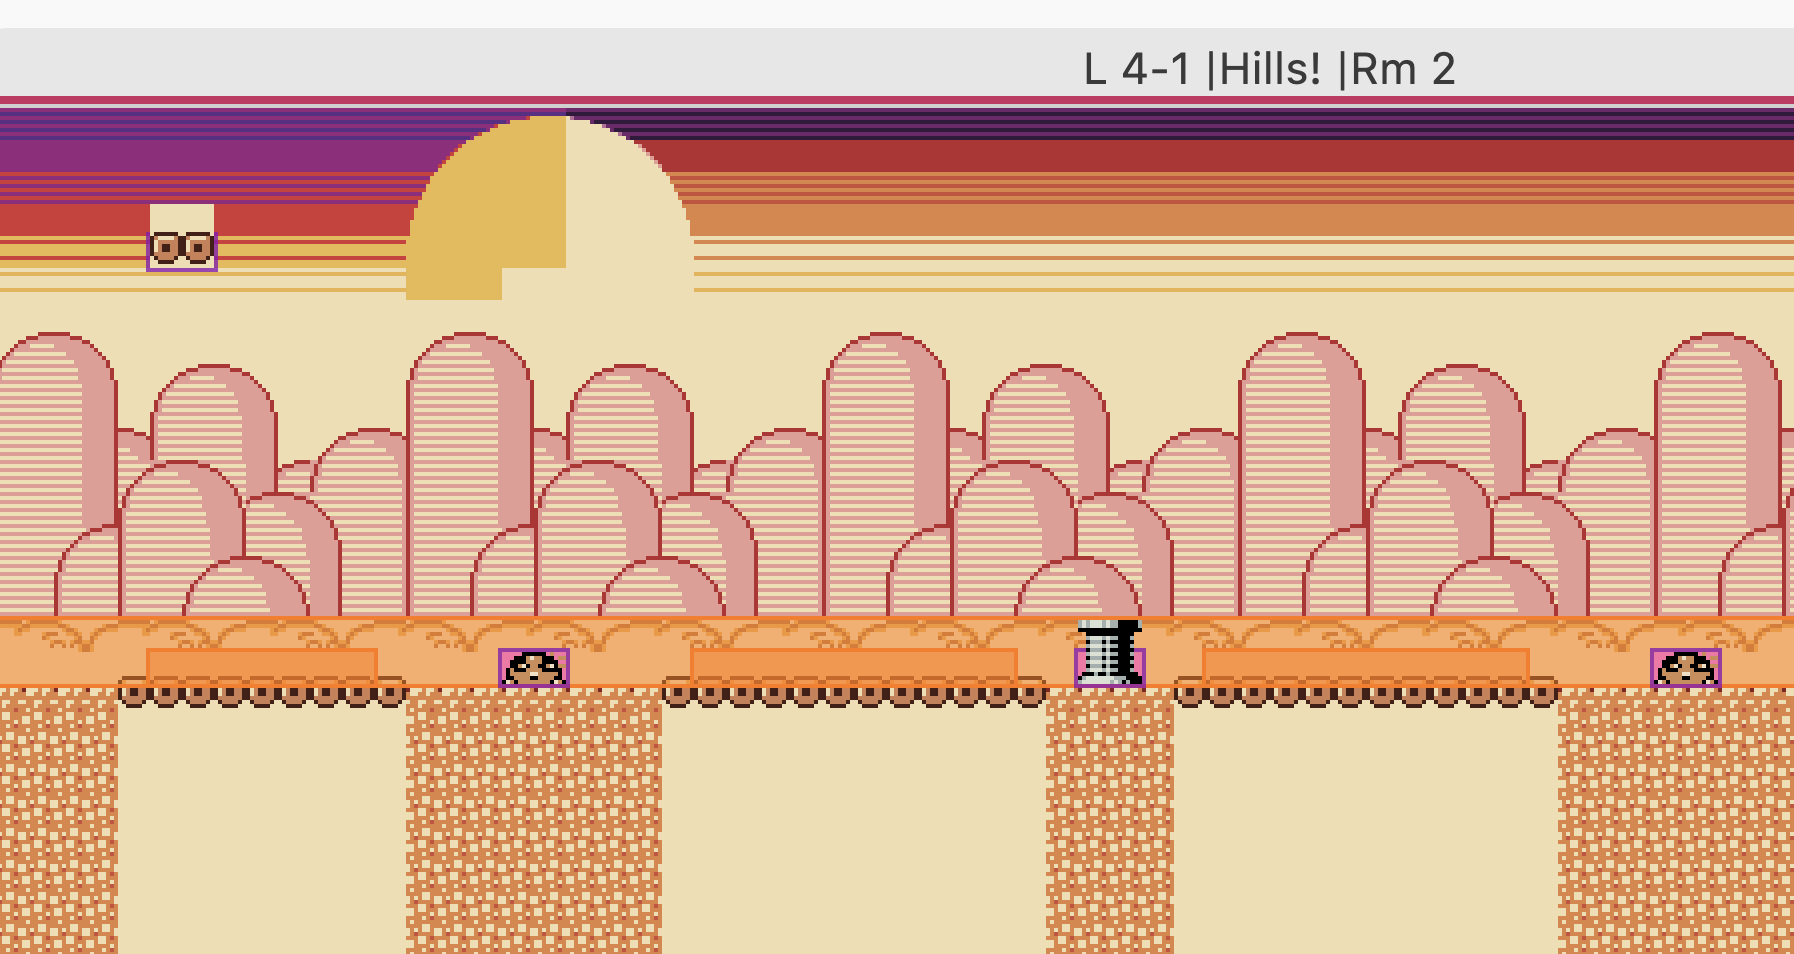
Now let’s make a trigger that covers the top of the bridge except for the first and last bridge piece
This trigger needs the following code:

So:
- Show Bridge Down
- Store the player’s X & Y position in a global variable
- If player is facing right, increment the player X storage variable by 1
- Set Bridge Down X position to Player X storage variable and Y position to the Y of the trigger + 1 (in this case, it’s 18)
Next, we have to create a trigger to make the bridge go back up (by hiding Bridge Down) when the player jumps or leaves the bridge. This trigger always has to be created after the bridge trigger(s) because of the way GB Studio prioritizes triggers. It won’t work right if it’s created before the bridge triggers.
Mine is spread out really far because I have multiple bridges in my scene, but the important thing is that it has to be above and to the left and right of the bridge trigger by at least one tile.
The only code you need to put into this trigger is code to hide Bridge Down:
Now you’re all set!
You can lay it out to add more than one bridge like I did, or you can have multiple on and off triggers throughout a scene
Stay tuned for Wink Beta 6, which will have this bridge and maybe a few more if I can think of some places to put it. In the meantime, check out Wink Beta 5
Comments
Log in with itch.io to leave a comment.
Cool tutorial Max!
Thanks Ben 😀
Great tutorial, definitely adding this one to my 'To do' list
Let me know when you do it so I can see :)